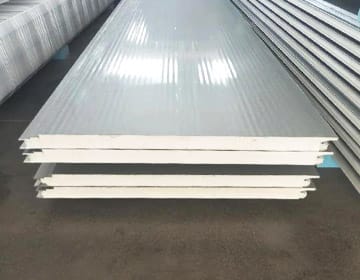
WPC (Wood-Plastic Composite) wall panels blend the elegance of natural wood with modern plastic’s resilience. They’re engineered to be moisture-resistant, insect-resistant, maintenance-free, and highly durable—ready to outperform traditional wood panels in almost every way. Designed with interlocking or hook-type systems, these panels are ideal for how to install wpc wall panels, making them a smart choice for both residential and commercial interiors
How to Prepare Walls for WPC Panel Installation
Proper wall preparation is the first step to success:
- Cleanliness is critical: Ensure the wall is clean, dry, and free of dust, grease, or protrusions. Repair any cracks or surface unevenness
- Accurate measurements and layout planning: Measure wall height and width twice—”measure twice, cut once”—and mark placement for outlets, windows, and trim
- Reference lines: Draw a level horizontal line using a spirit level to guide panel alignment throughout the installation
Best Tools for WPC Wall Panel Installation
Gather the following tools and materials for a seamless installation:
- Cutting tools: Circular saw (fine-tooth blade), jigsaw, or handsaw for clean cuts
- Measuring tools: Tape measure, level, pencil.
- Adhesives: Construction-grade or nail-free glue suitable for composites
- Fasteners and systems: Starter clips, metal trims, steel buckle clips, nails or screws (preferably countersunk).
- Safety gear: Gloves and eye protection.
Step-by-Step Guide for Installing WPC Wall Panels
1. How to Cut WPC Wall Panels
- Measure carefully and mark with precision.
- Choose tools like a fine-tooth circular saw or jigsaw for best edge quality.
- Secure the panel, cut with the decorative side down, and sand edges if needed
2. WPC Wall Panel Interlocking System Installation
Choose one of two main methods:
Direct Mount (Adhesive + Screws)
- Apply a zig-zag or grid pattern of high-strength adhesive on the back of the panel
- Press the panel onto the wall, hold for a minute, then secure with pilot-hole screws if necessary.
Frame-Based Installation
- Build a batten frame using wood or aluminum spaced every 12–20 inches.
- Secure panels to the frame using long screws, allowing thermal expansion space of about 3–5 mm
3. WPC Wall Panel Adhesive Types
Use a high-strength construction adhesive or nail-free glue. Spread evenly across the panel back, covering edges to avoid warping
4. DIY Installation of WPC Wall Panels: Step-by-Step Process
- Start in a corner with a starter strip for alignment.
- Install the first panel, align it precisely using a level, and secure in place.
- Add subsequent panels, snapping or slotting them into place. Use consistent pressure to ensure seamless alignment
- Add trims (corner, top, base) to finish edges and conceal imperfections.
WPC Wall Panels vs Traditional Wood Panels Installation
| Feature | WPC Wall Panels | Traditional Wood Panels |
|---|---|---|
| Installation Ease | Light, interlocking systems; easier DIY | Heavy, complex cuts; time-consuming |
| Durability | Moisture and insect resistant; fade-proof | Prone to warping, moisture damage |
| Maintenance | Minimal—soap and water cleaning | Requires sealants, repainting, frequent upkeep |
| Cost Over Time | Low maintenance costs, long-term savings | Higher upkeep and replacement costs |
| Environmental Impact | Often made with recycled composites | Relies on natural wood, less sustainable |
Overall, WPC wall panels offer a more durable, eco-friendly, and cost-effective solution compared to traditional wood.

Troubleshooting WPC Wall Panel Installation Issues
- Panel misalignment: Use a level or rubber mallet to adjust; avoid forcing panels.
- Gaps from thermal movement: Allow a small expansion gap at edges and transitions
- Poor adhesive bonding: Ensure wall and panel surfaces are clean and dry before applying adhesive.
- Fastener pull-through: Use pilot holes and proper-length screws to avoid surface damage.
- Uneven wall surface: Opt for frame-based installation to even out installation planes.
How to Clean and Maintain WPC Wall Panels After Installation
- Dust regularly with a soft or microfiber cloth.
- Clean stains using mild soap and water; rinse thoroughly
- Avoid harsh abrasives or oil-based cleaners.
- Inspect yearly for loose panels or damage, re-secure or reapply adhesive as needed.
WPC Wall Panel Installation Cost Breakdown
Material Costs
- Expect $3–$10 per square foot, depending on quality, finish, and thickness
- Compared to drywall, WPC might be 20–30% more upfront but offers better long-term resale and less upkeep
Installation Costs
- Contractors may charge $20 per square foot, ranging from $1–$40 per sq ft depending on complexity
- Standard 12×12 room (~144 sq ft) installation runs around $3,000–$4,500 total
- Homewyse indicates basic installation costs around $7.68–$11.40 per sq ft for paneling (as a broader category) in mid-2025
DIY Savings & Budget Tips
- Avoid labor charges—installing yourself significantly reduces cost.
- Purchase 10% extra material for cuts and mistakes. Container finishes with similar batches help maintain consistent coloring.
Design Flexibility: How WPC Panels Elevate Interior Aesthetics
WPC wall panels offer an unlimited palette:
- Match visual textures: wood grains, stone, leather, 3D designs.
- Pair with lighting, furniture, and trim for multi-dimensional effect.
- Enhance acoustic absorption and thermal insulation—great for living rooms, offices, or studios
Pro Tips and Common Mistakes to Avoid
- Always measure twice—mistakes cost time and materials.
- Cut carefully, sanding edges for clean joins.
- Maintain expansion gaps to handle climate shifts—about 3–5 mm at edges.
- Monitor temperature—install in ambient conditions to ensure proper adhesive set.
- Buy extra for replacements or future additions.
- Follow manufacturer specs—they may require special clips, spacing, or adhesive types.


